How to write a custom GNS plugin
May 19, 2017 /
2 comments / in
General
/ by CygNet Blog Admin
At users group last week I wanted to impress everybody with how I could make their phone ring before and after a failover. Since my machines were hosted in Azure, I wasn’t able to use a Dialogic card so I decided to quickly throw together a notification plugin using Twilio. Many of you asked about how I did that so I decided to write this blog detailing the steps. Although this example uses Twilio, it should give you everything you need to deliver your GNS notifications to many other platforms. If you have any questions, or write your own interesting plugin, please share in the comments section so that we can all learn together
I should also mention that this is an example and not supported product. Interfacing with Twilio is complicated and requires some work on the Twilio end to make everything work seamlessly. So this will provide you with a starting point but is not a complete out-of-the-box solution.
Requirements
- CygNet 8.2.0 or later
- Visual Studio (I used Community Edition 2017, but it should work with earlier versions)
- Basic C# development skills
- Basic understanding of CygNet
- A Twilio account (steps below)
About Twilio
When I sat down to write this plugin, it just wanted to do something very simple. I wanted to call a phone number and say a message. Basically reproduce what the GNS can do with a dialogics card. However with the Twilio API, you can’t just dial a phone number and send a message. You specify a phone number and a URL. The URL specified then tells Twilio what to do with that phone number. The syntax for this is called TWIML (https://www.twilio.com/docs/api/twiml). This is probably very helpful if you want to do something complex, but very frustrating if you want to do something simple. Twilio sort of solves this with something they call Twimlets (https://www.twilio.com/labs/twimlets). These are public URLs where you specify some parameters to generate the TWIML required to perform basic operations. Unfortunately, I kept getting errors when using these via the .NET API. I’m not sure if I was doing something wrong or if there is a bug in the Twilio code. Since It was midnight the night before my WESC presentation, I decided to just give up and write my own webhost to server up the basic TWIML that my demo required. I won’t post that code but it basically just produces the basic TWIML to speak a message.
So for demo purposes, the webhost I setup is still available and can be used, but it won’t be up forever. So DO NOT write a plugin that uses it. I guarantee that you will be disappointed when I decommission the site. If you want to use Twilio, you will need to configure your own webhost to serve up the TWIML required to handle your notifications (Or figure out how to get the Twimlets working). There are a lot of very powerful operations that Twilio provides so although it isn’t always quick and easy, you can have a very powerful solution.
Create a Twilio Account
I’m not going to provide exact steps, but you need to go to Twilio (https://www.twilio.com/) and create an account. This will give you $20 worth of free credit to try out the interface. Once you have an account, you will need to reserve a Twilio phone number. From the main console screen or dashboard, you should see a link near the bottom for “Phone Numbers”. From here you can add a new phone number that’s local to your area. This is the number that all the phone calls made from the plugin will appear to generate from. Write this number down as you will need it later. The other information you need from the main console screen is your “Account SID” and “Auth Token”. These are also required by the API to access your account.
Project Setup
- First, open Visual Studio
- Create a new Visual C# project that’s a Class Library (.NET Framework)
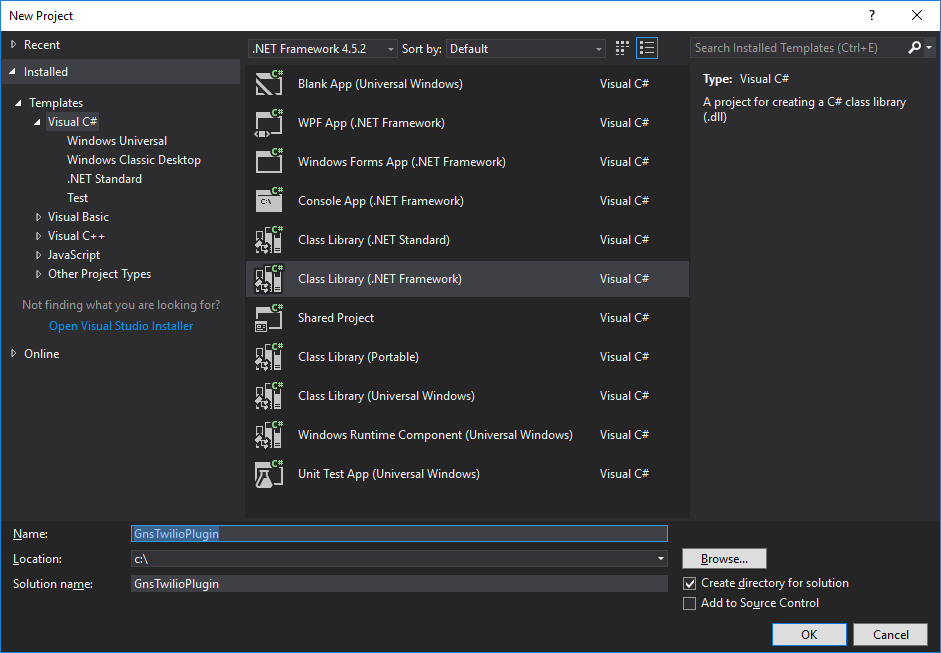
- Enter a name and path then press “OK” to create the project
- Right click on your project in the solution explorer and click “Manage NuGet Packages…”
- Browse for new packages and search for “Twilio”. I found two, but select the one just called Twilio with a description of “Twilio REST API helper library”. I’m using v5.4.1 but it may be updated in the future.
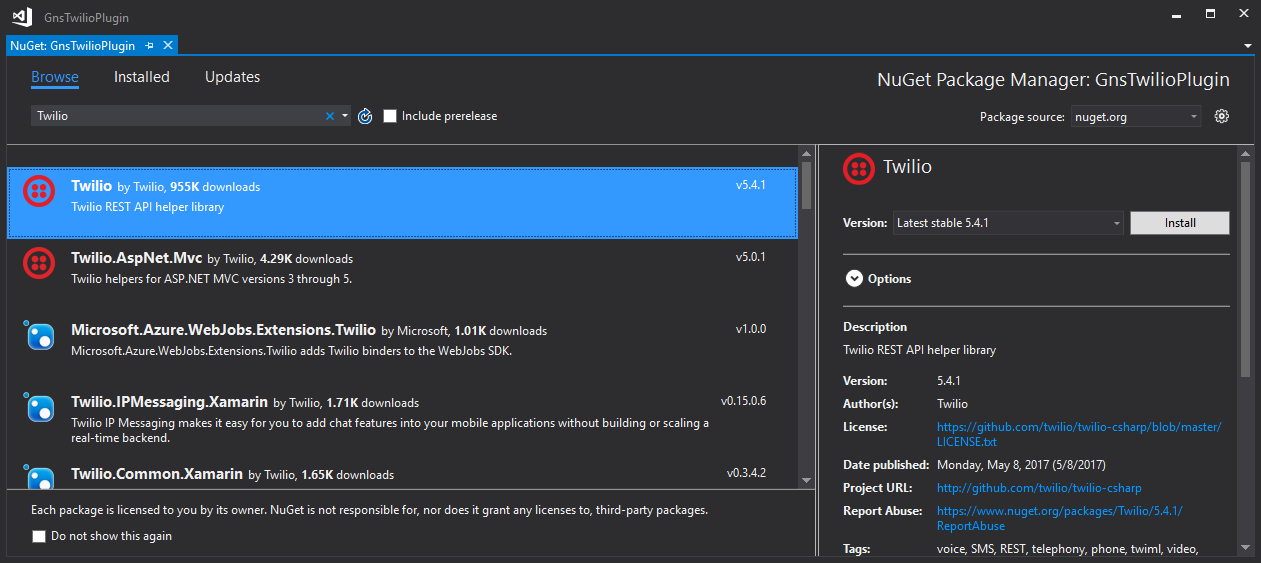
- Click to install the package. Accept the various notices.
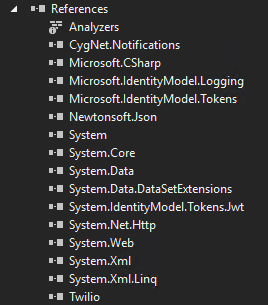
- Add a project reference to CygNet.Notifications.dll (If not already in the Plugins subfolder of your GNS, you can find it on the CD image in the GNS service directory)
- Add a project reference to System.Web
You references should now look something like this:
Add the Code
- Rename the default file “Class1.cs” to “GnsTwilioPlugin.cs” (Or erase it and add a new class)
- Open “GnsTwilioPlugin.cs” and replace the contents with the following code:
using System;
using System.Collections.Generic;
using System.Linq;
using System.Text;
using System.Threading.Tasks;
using CygNet.Notifications;
using Twilio;
using Twilio.Exceptions;
using Twilio.Types;
using Twilio.Rest.Api.V2010.Account;
using System.Web;
namespace GnsTwilioPlugin
{
public sealed class Plugin : CygNet.Notifications.INotificationPlugin
{
private String _twilioPhoneNumber = "+18005551234";
public Plugin()
{
var accountSid = "???";
var authToken = "???";
TwilioClient.Init(accountSid, authToken);
}
public void Validate()
{
// Put code here to validate that the plugin is properly configured
// (Perhaps twilio account info is coming from a config file instead of being hard coded...)
}
public NotificationPluginResult OnNotification(NotificationDetails notification)
{
Console.Write("Sending notification: Address '{0}'; Message '{1}'", notification.Address, notification.Message);
try
{
string url = "http://demo.twilio.com/docs/voice.xml";
//string url = "http://twiliowesc5.azurewebsites.net?a=" + HttpUtility.UrlEncode(notification.Message);
var uri = new Uri(url);
var call = CallResource.Create(new PhoneNumber(notification.Address), new PhoneNumber(_twilioPhoneNumber), method: Twilio.Http.HttpMethod.Get, url: uri);
Console.Write("Message sent!");
}
catch (TwilioException e)
{
Console.Write("Twilio exception: {0}", e.Message);
}
catch (Exception e)
{
Console.Write("Regular exception: {0}", e.Message);
}
return NotificationPluginResult.Acknowledge;
}
}
}
Looking at the code, you will notice three variables at the top that need to be replaced. These are the Twilio phone number, authentication token and account SID. You should have made note of these when creating your Twilio account so go ahead and replace them now.
What makes this a GNS plugin is that it inherits from the CygNet.Notifications.INotificaitonPlugin interface. That interface has two functions you need to overwrite. The first is Validate() which is called when you add the plugin to the GNS as a way to validate that it’s properly configured. This sample has no validation but if you were reading from a config file, or required external DLLs, you might validate those here. The second function is OnNotification() which is called whenever a notification comes in. The object passed in has all the info from the notification record for you to do with it as you will. For the purpose of this sample, I’m only using the address and message, but there is a lot more available.
In the OnNotification handler you will notice that I have two URLs in use. The first one is provided by Twilio as a sample and will just give a basic greeting. The second one that’s commented out is the one I wrote which will return the message in TWIML form. There are probably a number of limitations in terms of the length of the message string and possible characters in the message that would cause it to error. I tested a very basic message string which worked fine, but I make no guarantees that it’s foolproof. Feel free to try using it, but I make no promises that it will work!
This sample doesn’t provide a very robust logging method so if you want a log file dedicated to your plugin, you will need to add that yourself. The calls I make to Console.Write() will end up in the GNS log file. The ones included are just for diagnostic purposes but I would recommend removing them in a production environment as it would very quickly fill up your log file.
Build and Test
- Build your project for release
- Navigate to the “Plugins” folder inside your GNS service directory
- Create a new sub folder titled “GnsTwilioPlugin”
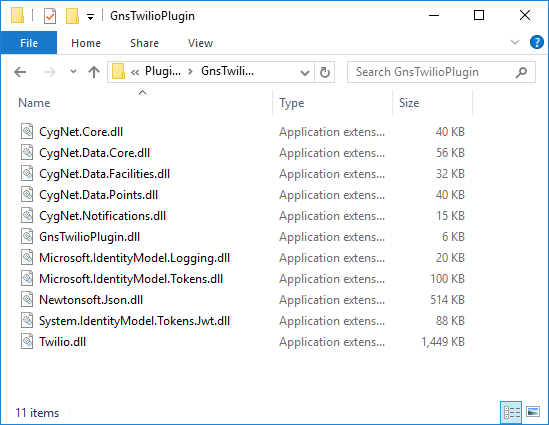
- Add the GnsTwilioPlugin.dll produced by your visual studio project (Located in the <Project Directory>\bin\Release folder)
- Add the other DLLs used by your plugin from the Release folder
These are the files I ended up with:
It’s now time to add the plugin to your GNS. This is done via CygNet Explorer.
- Open CExplore and navigate to your GNS
- Right click in the service pane and select “View Notification Plugin Manager”. (If that option isn’t available, you may need to upgrade CygNet to at least version 8.2.0)
- Add a new plugin. For details on what the fields mean, search for “GNS Plugin” in CygNet help.
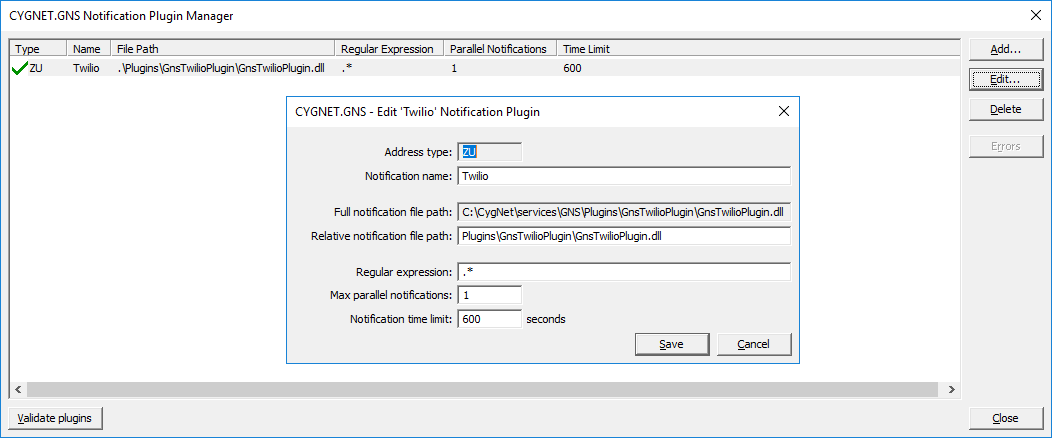
- Validate the plugin by clicking the “Validate plugins” button in the bottom left of the dialog
If the validation fails, click the “Errors” button on the right of the dialog, or check the GNS log file. When I first did this, I got an error about the path being inaccessible. I deleted the PluginData sub-directory within the GNS folder and that resolved the error. If anybody has other problems, please comment on this post.
We’re almost there! Now that we have the plugin added to our GNS, it’s time to test it.
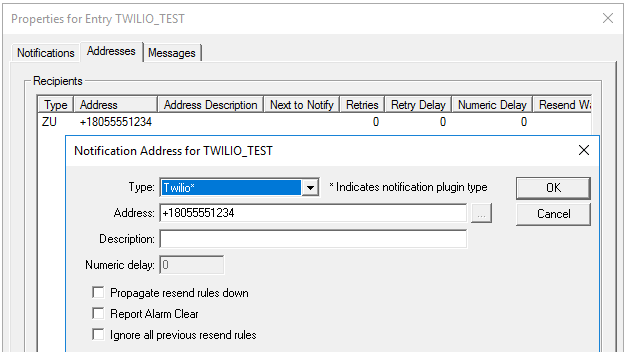
- From the GNS pane of CExplore, right click and add a new entry
- Set the record ID to “TWILIO_TEST”
- On the Addresses tab, create a new address record
- In the “Type” dropdown, select the entry for “Twilio.*”
- In the address field, type in a destination phone number. For my demo, I preceded the number with “+1” but it may work without that.
Now is the moment of truth! Add the notification to a point and put it into an alarm state. Then cross your fingers and hope your phone rings!
Obviously there is a lot that can go wrong in this process. So if something doesn’t work, please comment on this post so that myself or others who have it working can help. Hopefully it all works the first time! Even if you aren’t interested in using Twilio, you now have the framework for writing your own plugin. Just modify the code inside the OnNotification() function and do whatever you want with the message.
Good luck!!
Share this entry