Canvas Preview: Object Builder
November 9, 2017 /
0 comments / in
General
/ by Luke Williams
If you’ve been using CygNet for even a little while you will have heard discussion and seen presentations about the next CygNet HMI, Canvas. With its impending official release this fall we continue this multi-part series by introducing you to some of Canvas’ new and exciting features.
The last post introduced you to the Text Tool, and showed some options for its configuration in a specific or one-off use case.
In this post post we will introduce the Object Builder.
The Object Builder is not a control in the same sense that we’ve covered up to this point, the Object Builder can be a control, but it can also be a collection of controls. Let’s backup and explain the use case the Object Builder aims to improve and go from there.
Background
In Studio you might have several screens that display the same or similar information using a collection of Text Tools (as an example). These Text Tools were probably configured uniquely for each screen they appeared on, which is not bad, but it made changing and managing these instances quite tedious and laborious.
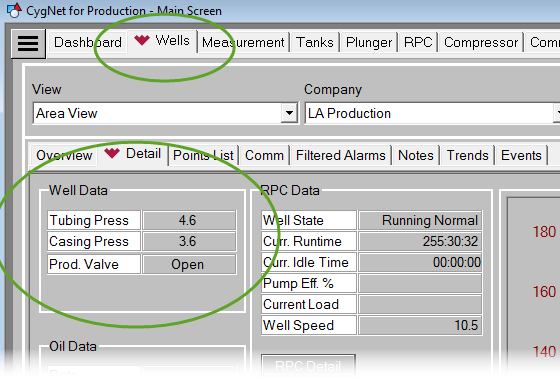
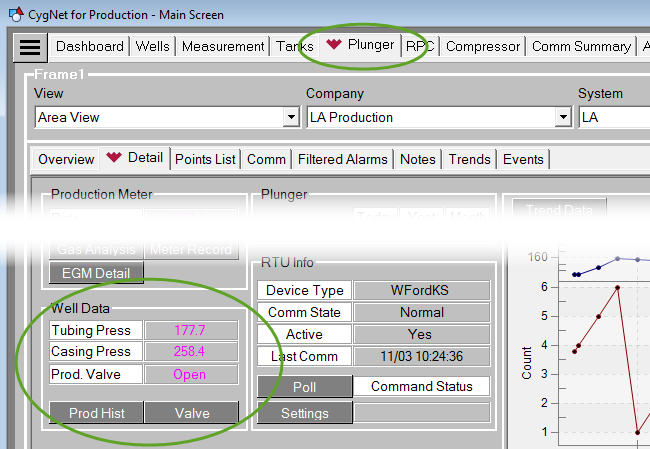
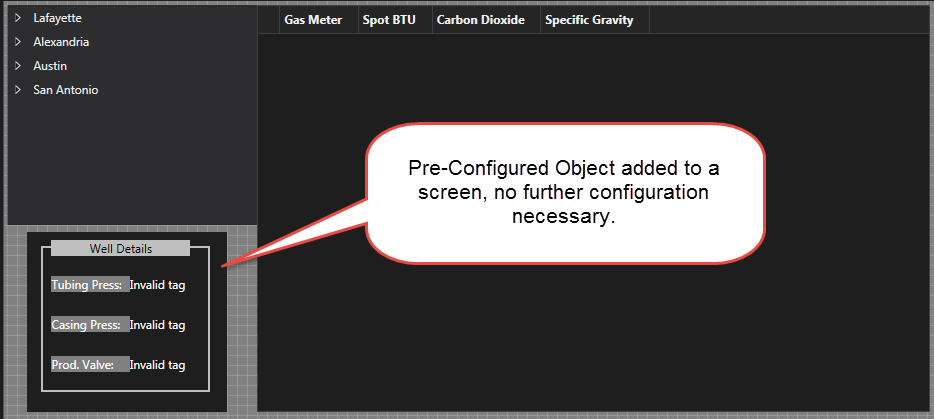
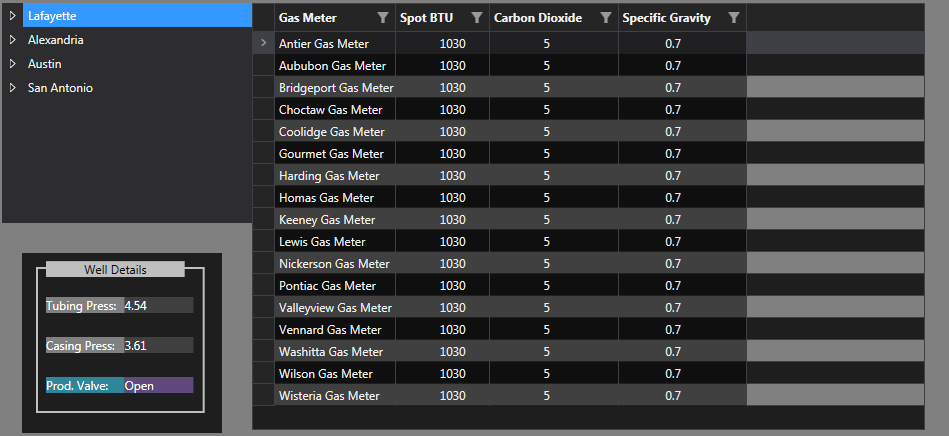
What if I wanted, in the example above, change the UDC being used to display the Tubing Pressure, or use the word Pressure instead of Press. In the images above, taken from some CygNet for Production screens, this would mean going to each screen the Well Data section existed, and making the change I wanted… For each tool, on each screen.
The Object Builder is designed to make that workflow a thing of the past. There is a new way…
The Object Builder allows you to create any collection of controls and save them as an ‘object’. This object can then be added to any number of screens or have any number of instances added on a screen. Each added object is simply using the template object you built, and any time you need to make a change, simply change the baseline object, and all objects will be updated the next time the screen is loaded.
This sounds easy enough, but in practice how simple is it really?
Let’s walk through the entire process and you can answer that question yourself (hint: it’s really easy).
Configuration
To begin we’ll create a new object. If you plan to use code in conjunction with any of the controls configured in the object choose between C# and VB.NET, otherwise, either will work.
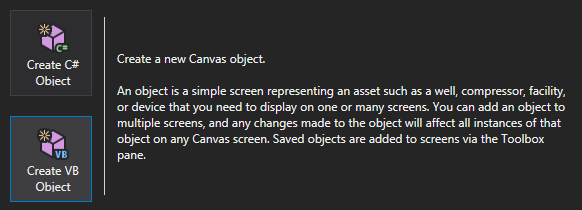
Create a new Canvas Object
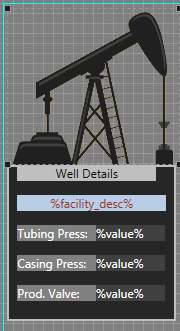
A new Object will load into a blank design view allowing you to add and configure the object contents.
Object – Design View
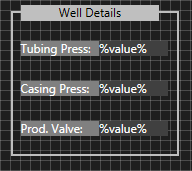
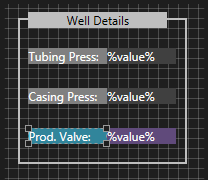
As an example I’ve re-created the Well Details section from those CygNet for Production images using Text Tools, and will save this as an object.
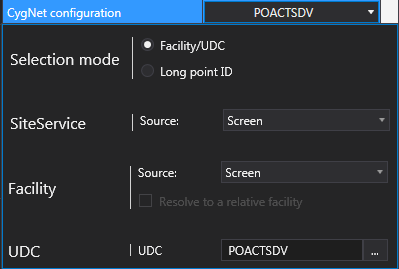
One thing to consider when making an object is that of Site.Service and Facility inheritance. Each of the controls in the object are set to get their Site.Service and Facility from the Screen. The ‘Object Screen’ will ultimately have its Site.Service and Facility set by the screen the Object is added to. So there is some subtle nesting concepts you’ll need to think about when planning how to construct your Object. Essentially this means it is easy to template Objects or make them static, whichever is more applicable for its intended use.
Control Properties
After the Object is configured, controls laid out, and properties set-up the way you want, the next step is to save the Object so that others can access it.
Saving
When thinking about saving an object, let’s consider why we’re making it in the first place.
More than likely this object will be placed on several screens which clients will want to view and load using their own instances of Canvas View (our Canvas read-only client). Objects work best when they are saved in the BLOB so that all clients and screens can use them.
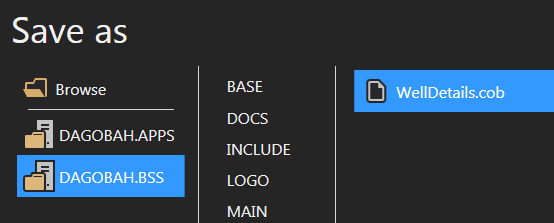
Saving to the BLOB
We recommend creating folders in the BLOB to store Objects.
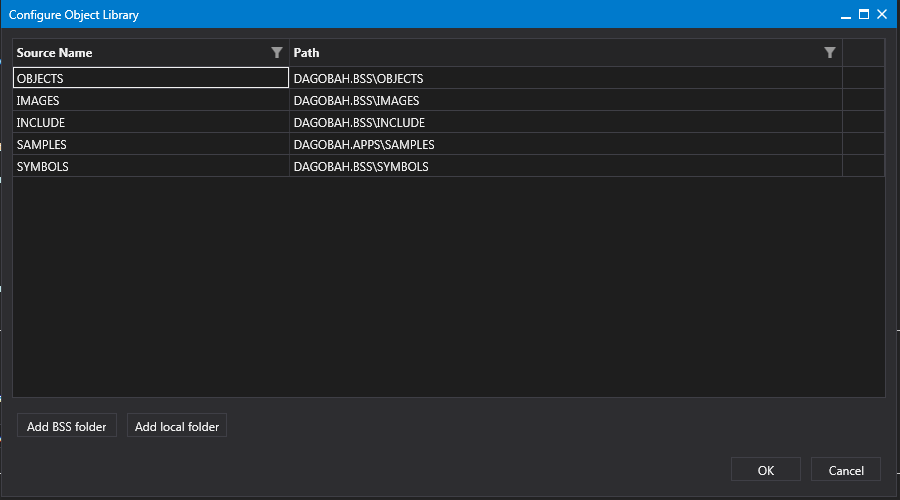
After setting up a storage location for our Objects, we want an easy way for all Clients to be able to point to the same location for object storage. This is handled by configuring the Object Library which defines where Objects are stored…
Object Library Button
Object Library Configuration
Objects can be stored (and referenced) in the BLOB or locally, either way, the folders that contain Objects should be added to the Object Library list.
Now that our object is created, saved in an accessible location, and Canvas knows where to look to access them, we can add the object to our screens.
Managing Objects
The first thing you’ll notice is that the newly created Object show up in the Toolbox along with the other Controls.
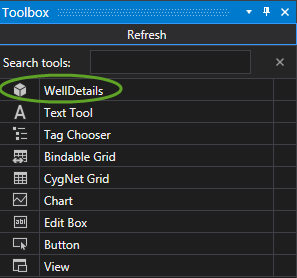
Toolbox List
The Object will now behave like any other control and can be added to any screens, and configured as desired.
Like a Control, you can set the Site.Service and Facility on the Object itself while designing it, or you can leave those settings empty and the Object will inherit the Site.Service and Facility from any screen it’s placed on.
Configure the rest of the screen as desired, the Object is already ready to run since it’s pre-configured.
Screen - Design View
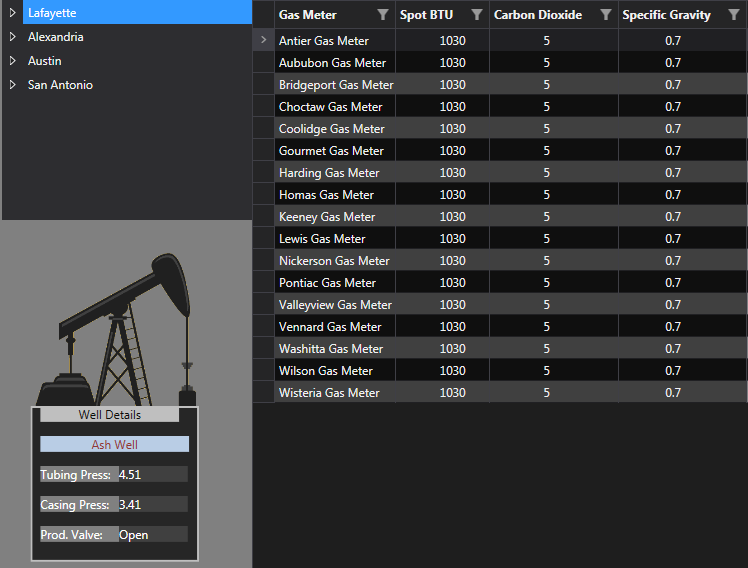
Taking this screen into Run Mode, the Object runs as configured when built. In this case it inherits the Site.Service from the Screen it’s placed on, the Facility comes from the Tag Chooser, the screen actually inherits its Facility from the Tag Chooser, and the Object inherits from the Screen, but essentially they’re both getting their Facility service from the Tag Chooser control. Finally each of the Text Tools in the Object are set to display current values for specific points associated with a Well, which Well? It depends on which Well Facility is selected from the Tag Chooser.
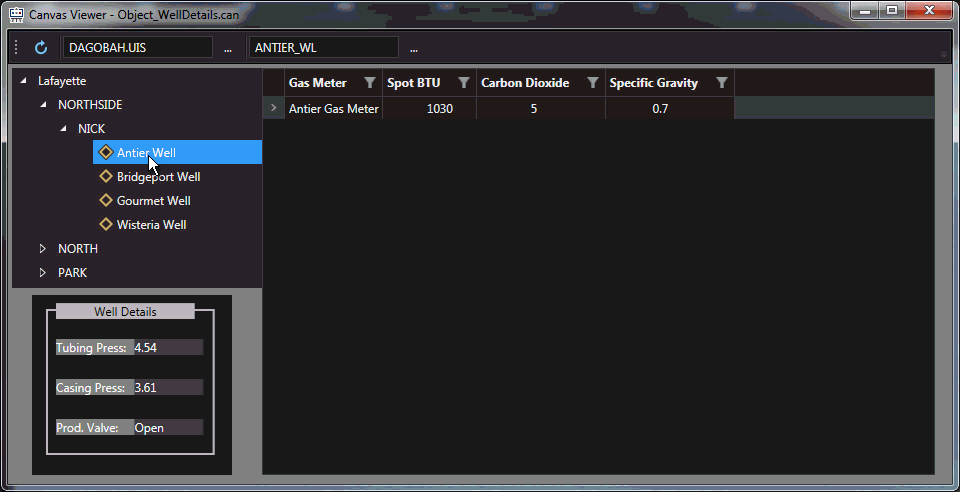
An Object in Run Mode
The grid is configured to display information about the associated Gas Meter of the selected Well, while the Object displays specific Well Detail information. This cross-facility association is supported primarily due to the Relative Facility function in Canvas, which will be covered in the next post.
From now on, any screen that needs to display this Well Detail information can be added to any number of screens. But what happens when we need to make a change to the Well Details object? Easy! Just open up the Object, make the edits, and save.
Edit Object
Here I will change the background color of two of the Text Tool’s in the Object, Save the Object, and re-load the example screen.
The next time any screens using that Object are opened, they will pull down the updated Object with whatever changes were made to it.
Updated Object in Run Mode
Use Case Example
Did I mention we have an Image Tool?
So after spending all that time working on making the above screen just the way I wanted, someone asked if they could have a pump jack image above the Well Details (fine, I asked myself if you must know, but it’s still a valid example). Normally this would be a lot of work since I have the Well Detail information in a bunch of different screens. But the good news is that I used an Object to create that layout! So it will be easy to edit.
Editing an Object
In fact, I just added an image above the text (I also changed the Text Tool background colors back), and saved the object, all the screens using this layout now have the new image.
Screen with Added Image
Working with Objects will save a lot of time when it comes time to update, edit or enhance a particular layout or workflow. Try them out and be comfortable with managing Objects instead of juggling hundreds of individual disparate pieces.
You can begin to see how these controls work together to display a holistic view of a site without the need for scripting or advanced configuration.
Objects open up a new world of possibilities in terms of how we build and template screens and how we can go about managing and editing them.
The Text Tool is just a simple example of the capability of this workflow but hopefully you can see the sea change the Canvas Object is bringing to Canvas.
Next post we will cover the Relative Facility function you’ve already seen used in the last few posts.
Share this entry